Summer always seems to arrive overnight around here.
One week we’re packing jackets for tennis games, and the next week my girls are running through the sprinkler asking for something cold every afternoon.
My youngest daughter has been especially persistent lately. Every trip to the grocery store includes a request for colorful frozen desserts from the freezer aisle.
The problem?
Most of those treats are packed with ingredients I can’t pronounce and enough artificial colors to make me hesitate.
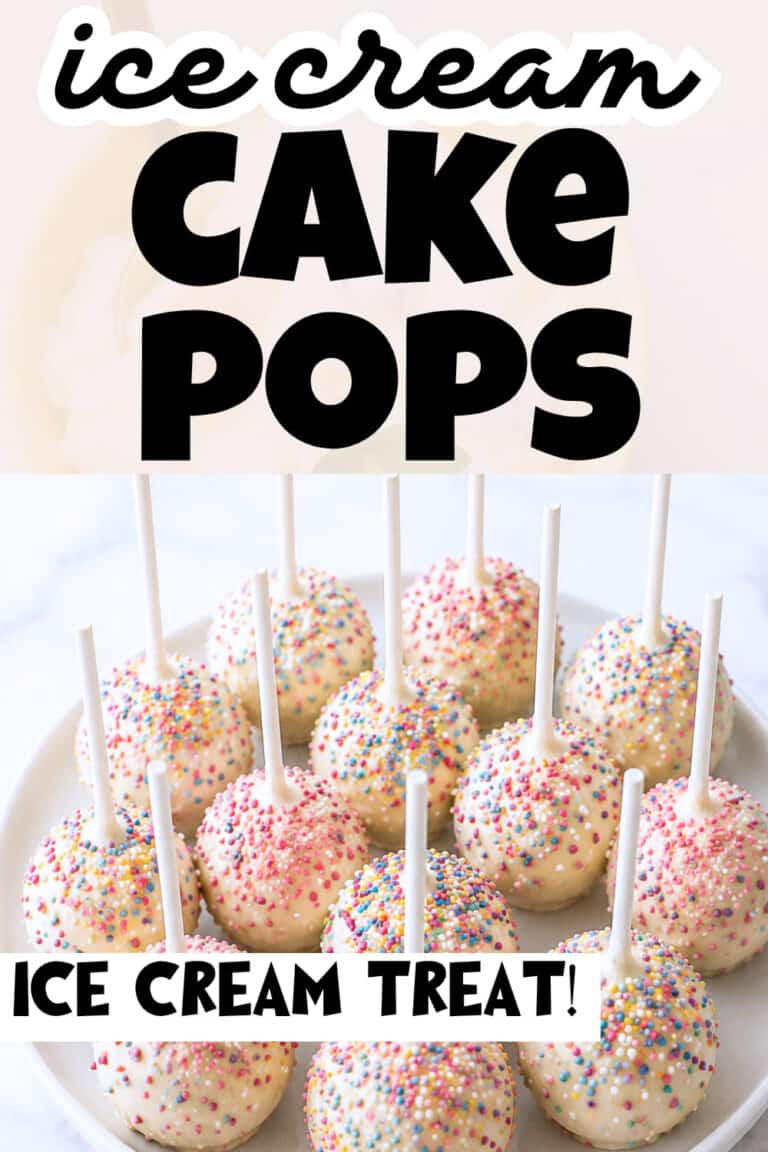
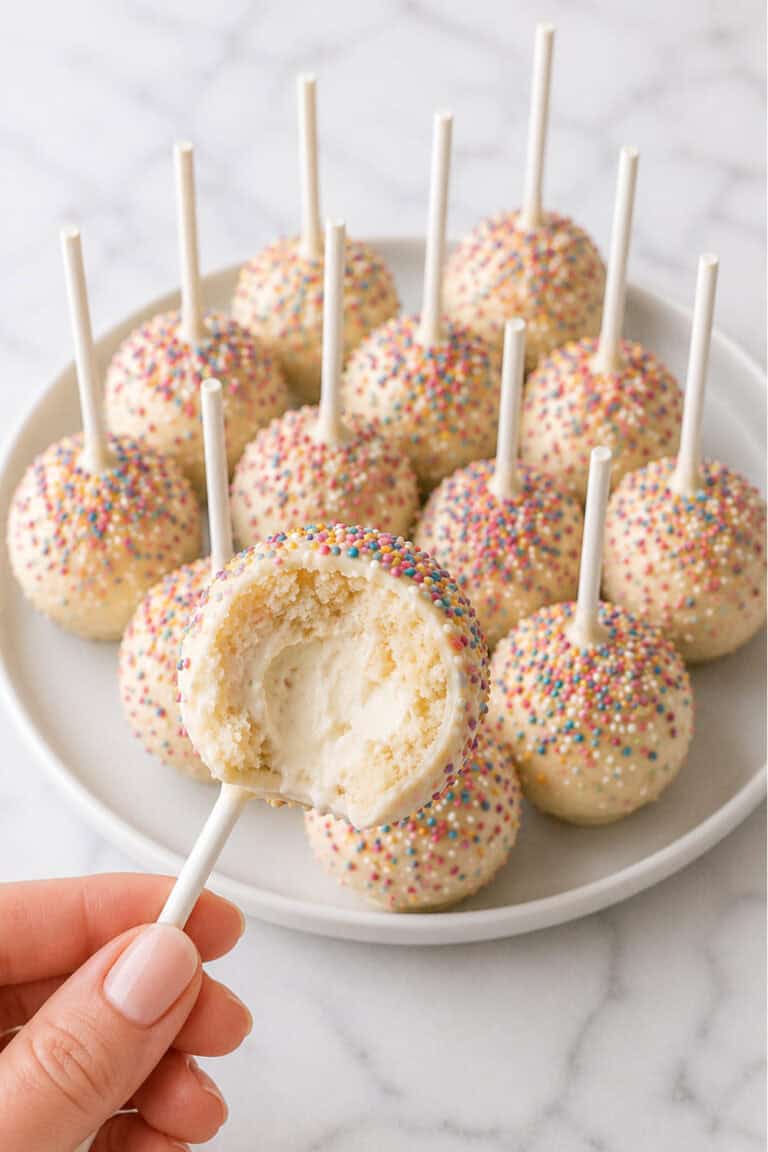
That’s what inspired these Ice Cream Cake Pops.
They have all the fun of a frozen treat, but they’re made with simple ingredients right at home. They look adorable, they’re easy to customize, and they’re the kind of dessert that makes kids come running when they hear the freezer door open.
If you’re looking for a sweet way to cool down on a hot summer day, these little frozen pops are always a hit.
Ingredients to Make Homemade Ice Cream Cake Pops
For the Cake Pops
- 1 prepared cake (vanilla, chocolate, or funfetti)
- 2 cups vanilla ice cream, slightly softened
- 12 cake pop sticks
For the Coating
- 2 cups white chocolate chips or candy melts
- Sprinkles, crushed cookies, mini chocolate chips, or other toppings
How to Make Ice Cream Cake Pops

Step 1: Crumble the Cake
Start by placing your completely cooled cake into a large mixing bowl.
If the cake is still warm, it can make the mixture too soft later on, so be patient and let it cool first.
Using clean hands or a fork, break the cake into fine crumbs.
This is actually my girls’ favorite part because it’s a little messy and fun. Keep crumbling until there are no large chunks left and the texture looks even throughout.
Step 2: Mix with Ice Cream
Add the softened ice cream to the bowl with the cake crumbs.
The ice cream should be soft enough to stir easily but not completely melted.
Mix everything together until the cake crumbs and ice cream are fully combined.
The mixture should resemble a thick cookie dough that holds together when squeezed. If it seems a little dry, add a small spoonful of ice cream. If it feels too soft, pop the bowl into the freezer for 10 to 15 minutes before moving on.
Step 3: Form the Cake Pops
Using a cookie scoop or spoon, portion out the mixture and roll it between your hands to create smooth balls.
Place each cake ball on a parchment-lined baking sheet as you work.
Once they’re all rolled, carefully insert a cake pop stick into the center of each one. I like to push the sticks in about halfway so they’re secure and easy for little hands to hold later.
Step 4: Freeze
Place the entire baking sheet into the freezer and let the cake pops chill for at least 2 hours.
This step is important because the pops need to be firm before dipping them in chocolate.
If they’re too soft, they can slide off the sticks or fall apart during dipping. When they’re ready, they should feel solid and hold their shape easily when picked up.
Step 5: Melt the Chocolate
While the cake pops are freezing, prepare the coating. Add the white chocolate chips or candy melts to a microwave-safe bowl.
Microwave in 30-second intervals, stirring well after each round. Continue until the chocolate is completely melted and smooth. Be careful not to overheat it since chocolate can burn quickly. If the chocolate seems a little thick, stir in a teaspoon of coconut oil to help create a smoother coating.
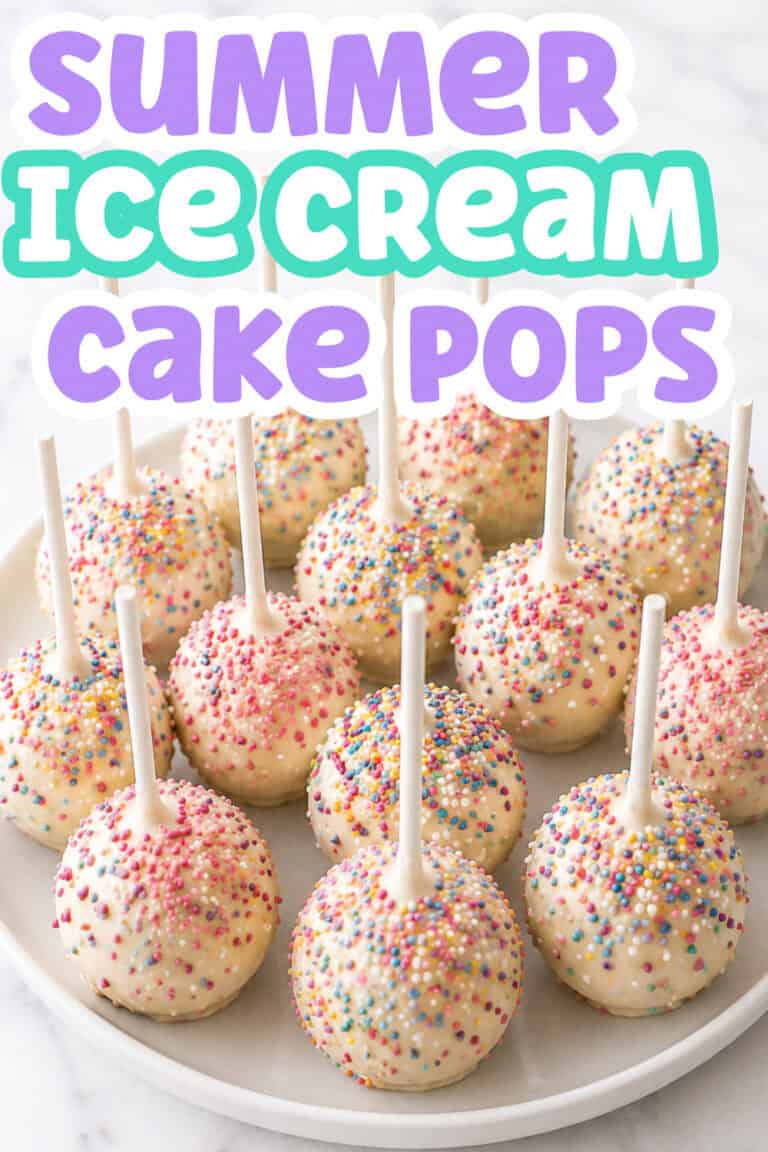
Step 6: Dip and Decorate
Remove a few cake pops from the freezer at a time, leaving the rest cold while you work.
Dip each pop into the melted chocolate, turning gently to coat all sides.
Lift it out and lightly tap your wrist against the side of the bowl to remove any excess chocolate. Before the coating has a chance to harden, immediately add your sprinkles, crushed cookies, or favorite toppings.
This is usually when my daughters gather around the counter and get creative with decorations. No two ever look exactly alike, and that’s part of the fun.
Step 7: Freeze Again
Place the decorated cake pops back onto the parchment-lined baking sheet.
Return them to the freezer for another 30 minutes so the coating can fully set and everything firms up nicely. After that, they’re ready to enjoy.
I like to keep a batch tucked away in the freezer because they’re perfect for those hot afternoons when someone inevitably asks, “Do we have anything cold for dessert?”
Yummy Summer Treat
With the hot weather these ice cream cake pops make the perfect outdoor treat for your kids and family!
Have fun mixing up the ingredients and making it your own!